22 Jan 2016

♪ သီခ်င္းနားေထာင္ရာမွာပိုျပီးအသံထြက္ေကာင္းမြန္ေစမယ့္ - Equalizer & Bass Booster Pro v1.2.9 Apk (21-Jan) ♫

Cover art

Equalizer & Bass Booster Pro ေလးကေတာ့ ဖုန္းထဲမွာ သီခ်င္းနားေထာင္တဲ့အခါ Bass အသံ ထြက္ျပီးပိုနားေထာင္ေကာင္းအာင္ ကူညီေပးမွာ ျဖစ္ပါတယ္။ အခုအသစ္ထြက္လာတဲ့ Version မွာေသာ Feature အသစ္ေလး မ်ားနဲ႕ထည့္သြင္းေျပာင္းလဲခဲ့ပါတယ္။ Bass သံဆိုတာကလည္း သီခ်င္းေတြ နားေထာင္ရင္ အထူးသျဖင့္ Rock သီခ်င္းေတြနားေထာင္ရင္ အရမ္းအရသာရွိပါတယ္။ Bass အသံေကာင္းေကာင္းေလးနဲ႔ နားေထာင္ ခ်င္တယ္ဆိုရင္ေတာ့ ဒီေကာင္ေလးကို သြင္းထားလိုက္ပါ တစ္ခုေတာ့႐ွိတယ္။ ဒါ့အျပင္ သီခ်င္းေတြ 
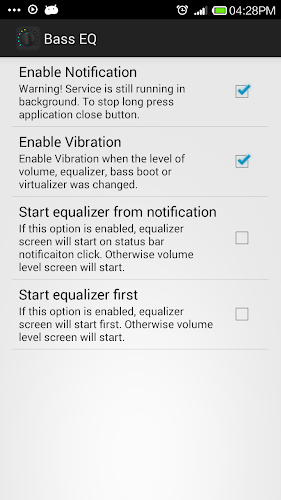
နားေထာင္တဲ့အခါမွာလည္း effect ေတြျဖစ္တဲ့ Equalizer ေတြ ကိုလည္း စိတ္ႀကိဳက္ ခ်ိန္ညွိႏိုင္ မွာ ျဖစ္ပါတယ္။ တစ္ခုေတာ့႐ွိတယ္ bass အသံကို ၾကားခ်င္တယ္ ဆိုရင္ေတာ့ နားၾကပ္တပ္ၿပီး နားေထာင္ရ မွာျဖစ္ပါတယ္။ Pro version ျဖစ္ တာေၾကာင့္ Playstore မွာဆိုရင္ ပိုက္ဆံေပးဝယ္ရမွာျဖစ္ ၿပီး ေအာက္မွာ Free Download ရယူႏိုင္ပါတယ္ file size 1MB သာ႐ွိၿပီး Android 2.3 ကစၿပီး အသံုးျပဳႏိုင္ပါတယ္။

Features:
* Five bands Equalizer
* Bass Boost effect
* Virtualizer effect
* 10 Equalizer presets
* Media volume control
* Stereo led VU meter


   Equalizer & Bass Booster Pro- screenshot          Equalizer & Bass Booster Pro- screenshot
   Equalizer & Bass Booster Pro- screenshot          Equalizer & Bass Booster Pro- screenshot
   Equalizer & Bass Booster Pro- screenshot       Equalizer & Bass Booster Pro - screenshot


**  Step-1.ေအာက္က Download Button ကိုႏွိပ္လိုက္ပါ

**  Step-2. "5sec". ေလာက္ေစာင္႕ေပးပါ။

**  Step-3. "  << SKIP AD >>   ".ကိုႏွိပ္ေပးပါ။

**  Step-4. Download Link က်လာပါလိမ္႕မယ္။

**  အဆင္ေျပပါေစဗ်ာ။

   Download

♪ ဖုန္းထဲကေနေဒါင္းခ်င္ရာအားလံုးေဒါင္းယူႏိုင္တဲ့ - Advanced Download Manager Pro v5.1.0 Apk (22-Jan) ♫

Cover art

Android Phone ေပၚကေန ဘယ္ဟာျဖစ္ျဖစ္ ေဒါင္းခ်င္တာအားလံုးကိုေဒါင္းယူေပးႏိုင္မယ့္ Advanced Download Manager Pro ေနာက္ဆံုးထြက္ Version ေလးကိုတင္ေပးလိုက္ပါတယ္ဗ်ာ။ ကၽြန္ေတာ့္ လက္စြဲေလးပါပဲ။ Download Speed ျမန္ဆန္ျပီး Resume Download ရတဲ့အတြက္ အေတာ္အဆင္ေျပပါ တယ္။ Facebook မွ Video မ်ားကို လည္းေဒါင္းယူႏိုင္ပါတယ္။ Android OS 2.1 ႏွင့္အထက္ဖုန္းမ်ားမွာ အသံုးျပဳႏိုင္မွာျဖစ္ပါ တယ္ဗ်ာ။


   Advanced Download Manager Pro- screenshot         Advanced Download Manager Pro- screenshot

   Advanced Download Manager Pro- screenshot         Advanced Download Manager Pro- screenshot

   Advanced Download Manager Pro- screenshot         Advanced Download Manager Pro- screenshot

   Advanced Download Manager Pro- screenshot         Advanced Download Manager Pro- screenshot


**  Step-1.ေအာက္က Download Button ကိုႏွိပ္လိုက္ပါ

**  Step-2. "5sec". ေလာက္ေစာင္႕ေပးပါ။

**  Step-3. "  << SKIP AD >>   ".ကိုႏွိပ္ေပးပါ။

**  Step-4. Download Link က်လာပါလိမ္႕မယ္။

**  အဆင္ေျပပါေစဗ်ာ။

   Download

♪ ဖုန္းနဲ႕ Video ေတြဖန္တီးနိုင္ Edit လုပ္နုိင္တဲ့ - KineMaster – Pro Video Editor Full v3.2.0 Apk (20-Jan) ♫

   KineMaster – Pro Video Editor- screenshot

အခုတင္ေပးလိုက္တဲ့ Application ေလးကေတာ့ ဖုန္းထဲကေန Video ေတြကို Edit လုပ္ေပးနိုင္တဲ့ Application တစ္ခုျဖစ္ပါတယ္ဗ်ာ။ ဘယ္လို Edit လုပ္ေပးနိုင္သလည္းဆိုရင္ Video တစ္ခုကို ေနာက္ခံ အသံေတြေဖ်ာက္နိုင္ပါတယ္။ ေနာက္ခံသီခ်င္းအသံေတြထပ္ထည့္နိုင္ပါတယ္။ မိမိမလိုခ်င္တဲ့ Video အခန္း မ်ားကိုလည္းဖ်က္နိုင္ပါေသးတယ္။ မိမိၾကိဳက္ႏွ္စ္သက္တဲ့ Video ဇတ္၀င္ခန္းေတြကိုလည္း တစ္ခုထည္း အျဖစ္စုေပါင္းနိုင္ပါေသးတယ္။ အမွတ္တရ Video ေတြ Photo ေတြကိုစုေပါင္းျပီး မွတ္တမ္းေလးတစ္ခု လည္းလုပ္နုိင္တာေပါ့ဗ်ာ။ ဖန္တီးရယူလိုက္တဲ့ Video ရဲ႕ Quality ကေတာ့ တကယ့္ကိုရုပ္ထြက္ေကာင္းတဲ့ အေနအထားမ်ိဳးကိုရရွိေစမွာျဖစ္ပါတယ္ဗ်ာ။ Feature ေတြစံုလင္တာေၾကာင့္ မိမိေသခ်ာကလိနိုင္ရင္ မိမိေသခ်ာဖန္တီးနိုင္ရင္ ေကာင္းမြန္တဲ့ Video တစ္ခုကိုရွိနိုင္မွာျဖစ္ပါတယ္ဗ်။ အေသးစိတ္ကိုေလ့လာခ်င္ ရင္ေတာ့ ေအာက္မွာဆက္လက္ေလ့လာနိုင္ပါတယ္ဗ်ာ။ Android OS 4.0 ႏွင့္အထက္ဖုန္းမ်ားမွာအသံုးျပဳ နိုင္မွာျဖစ္ပါတယ္ဗ်ာ။


Features
• Multiple layers for video, images, stickers, text, handwriting in video clips
• Frame-by-frame trimming, splicing and slicing
• Instant preview anytime
• Hue, brightness and saturation controls
• Speed control for video clips
• Fade in/fade out sound (overall)
• Volume envelope (Precise volume control from moment to moment within a clip)
• Transition effects (3D transitions, wipes, fades, and more)
• A variety of themes, animations and visual and audio effects
• Share on YouTube, Facebook, Google+, Dropbox and more
Your feedback and suggestions will help us continue to improve KineMaster.
Please join the KineMaster user community and share your ideas.
- KineMaster user community(Google+): https://goo.gl/gUEuB4
For more details, questions and enhancement requests, please contact: support@kinemaster.com.
Supported OS and Devices
• KineMaster can be used on most devices running Android 4.1.2 (Jelly Bean MR2) and above, but you will have the best editing experience when using the latest Android version available for your device.
• For the best editing performance with KineMaster, including 1080p support and video layers, devices using one of the following chipsets are recommended:
- Qualcomm Snapdragon 800/801/805/808/810
- Tegra K1
- Kirin 920 HiSilicon 3630
- Samsung Exynos 7 Octa 7420
Supported Formats
• Video formats: .mp4 (H.264 Baseline/Main/High Profile + AAC LC), .3gp (H.264 Baseline/Main/High Profile + AAC LC), .mov (H.264 + AAC LC only, and only on devices where .mov files appear in the device’s pre-installed Gallery app))
• Audio formats: .mp3, .m4a, .aac
• Image formats: .jpg, .png
• Real-time video and audio recording


   KineMaster – Pro Video Editor- screenshot

   KineMaster – Pro Video Editor- screenshot

   KineMaster – Pro Video Editor- screenshot

   KineMaster – Pro Video Editor- screenshot

   KineMaster – Pro Video Editor- screenshot

   KineMaster – Pro Video Editor- screenshot


**  Step-1.ေအာက္က Download Button ကိုႏွိပ္လိုက္ပါ

**  Step-2. "5sec". ေလာက္ေစာင္႕ေပးပါ။

**  Step-3. "  << SKIP AD >>   ".ကိုႏွိပ္ေပးပါ။

**  Step-4. Download Link က်လာပါလိမ္႕မယ္။

**  အဆင္ေျပပါေစဗ်ာ။

   Download

ကမာၻေက်ာ္ Hero ေတြယွဥ္ၿပိဳင္တိုက္ခိုက္ရမယ့္ ဂိမ္းေလး - MARVEL Future Fight v1.9.0 Apk

Download
                             
                          Unknown user How to Download                         
                               
                                     www.patheinit.com
                                       
Payephyokyaw


Netgate Spy Emergency 19.0.305.0 Full Keygen

 
Netgate Spy Emergency 19.0.305.0 ေနာက္ဆံုးထြက္ Update ေလးပါ..။ ေဆာ့ဝဲလ္ ေတြ Install ထည့္လိုက္တဲ့အခါတိုင္း ၎ေဆာ့ဝဲလ္ ေတြနဲ႔အတူ ဝင္ေရာက္လာတတ္တဲ့ spyware, malware,spam ႏွင့္အျခားေသာ dialers,scumware, keyloggers, data mining,software,toolbars, tracking cookies, browser, hijackers/BHO's အပါအ၀င္မလိုအပ္ေသာ software ေတြကိုပါ removes ျပဳလုပ္ေပးႏိုင္ၿပီး computer ေလးလံေႏွးေကြးေနသူေတြအတြက္ေဆာင္
ထားသင့္တဲ႔ေဆာ့ဝဲလ္ေလးပါ။ ဖိုင္ဆိုဒ္ကေတာ့ 25.39MB ရွိၿပီး Windows XP / Vista/ 7/ 8/ 8.1/ 10 (32-bit or 64-bit) အထိ အသံုးၿပဳနိုင္ပါတယ္။ Full Version သံုးရေအာင္ keygen ဖိုင္ထည့္ေပးထားပါတယ္။ အသံုးၿပဳလိုတဲ့ မိတ္ေဆြမ်ား ေအာက္မွာ ေဒါင္းလုဒ္ ရယူလိုက္ပါ။


Download & Links

{GoogleDrive} {ZippyShare} {SolidFiles}


 www.ayekyaw.org

Netgate Registry Cleaner 12.0.305.0 Full Keygen


Netgate Registry Cleaner 12.0.305.0 ေနာက္ဆံုးထြက္ Update ေလးပါ..။ Windows စနစ္ရဲ႕ အဓိက အေရးပါတဲ့ Registry ထဲ မွ မွားယြင္းေနတဲ႕ registry အပိုင္းအစေတြ မလိုအပ္တဲ႕ registry  key ေတြကို ၿပန္လည္ၿပဳၿပင္ေပးႏိုင္တဲ႕ Program ေလးပါ။ Computer ရဲ႕ System speed ကို ၿမွင့္တင္ေပးႏိုင္ၿပီး Windows System ထဲမွာ ျဖစ္ေပၚေလ့ရိွ္ေနတဲ႔ defragment နဲ.  registry ပိုင္းကို အေကာင္းဆံုးလုပ္ေဆာင္ေပးနိုင္တာျဖစ္တဲ့ အတြက္အသံုးျပဳခ်ိန္ၾကာလာ လို႔ေလးလံေႏွးေကြးလာခဲ့ရင္ ဒီ program ေလးက ေၿဖရွင္းေပးႏိုင္ပါတယ္။ ဖိုင္ဆိုဒ္ကေတာ့ 7.9 MB ရွိၿပီး Windows XP / Vista/ 7/ 8/ 8.1/ 10 (32-bit or 64-bit) အထိ အသံုးၿပဳနိုင္ပါတယ္။ Full Versionသံုးရေအာင္ keygen ဖိုင္ထည့္ေပးထားပါတယ္။ အသံုးၿပဳလိုတဲ့ မိတ္ေဆြမ်ား ေအာက္မွာ ေဒါင္းလုဒ္ ရယူလိုက္ပါ။
Download & Links

{GoogleDrive} {ZippyShare} {SolidFiles}


 www.ayekyaw.org

Office Pro Plus 2013 Sp1 Update 2016 Full


Office Pro Plus 2013 Sp1 Update 2016 ေနာက္ဆံုးထြက္ Update ေလးပါ..။ Product Keys မ်ား ၊ Activator မ်ားသံုးစရာ မလို RePack (Activated) လုပ္ျပီးသား Microsoft Office 2013 SP1 32x64 Pro ကိုတင္ေပးလိုက္ပါတယ္။ Office 2013 Pro နဲ႔အတူ Visio,Project 2013 တို႔ပါပူးတြဲပါဝင္တာေၾကာင့္ ဖိုင္ဆိုဒ္ကေတာ့ၾကီးပါတယ္။ ဖိုင္ဆိုဒ္ကေတာ့ (2.2 GB) ရွိတာေၾကာင့္ဖိုင္ 7 ဖိုင္ခြဲျပီးတင္ေပးလိုက္ပါတယ္။ အသံုးၿပဳလိုတဲ့ မိတ္ေဆြမ်ား ေအာက္မွာ ေဒါင္းလုဒ္ ရယူနိုင္ပါၿပီ။


Programs included in Microsoft Office Professional Plus 2013:
• Microsoft Access
• Microsoft Excel
• Microsoft InfoPath
• Microsoft Lync
• Microsoft OneNote
• Microsoft Outlook
• Microsoft PowerPoint
• Microsoft Publisher
• Microsoft SkyDrive Pro
• Microsoft Visio Viewer
• Microsoft Word
• Office Shared Features
• Office Tools
System Requirements Office 2013
  • Computer and processor: 1 GHz or greater x86/x64 Processor with SSE2 instruction set
  • Memory: 1 GB RAM (32-bit) / 2 GB RAM (64-bit)
  • Hard Disk: 3.5 GB free disk space
  • Operating System: Windows 7, Windows 8, Windows Server 2008 R2 or newer
  • Graphics: Graphics hardware acceleration requires DirectX10 graphics card.


Office 2013 32 Bit

KumpulBagi

  
 MirrorCreator
 
Microsoft Office Pro Plus 2013 Sp1 Update Januari 2016_Part 1

Microsoft Office Pro Plus 2013 Sp1 Update Januari 2016_Part 2

Microsoft Office Pro Plus 2013 Sp1 Update Januari 2016_Part 3

Microsoft Office Pro Plus 2013 Sp1 Update Januari 2016_Part 4

Microsoft Office Pro Plus 2013 Sp1 Update Januari 2016_Part 5

Microsoft Office Pro Plus 2013 Sp1 Update Januari 2016_Part 6

Microsoft Office Pro Plus 2013 Sp1 Update Januari 2016_Part 7
 
 ====================================================
 

Office 2013 64 Bit

 KumpulBagi
 
Microsoft Office Pro Plus 2013 Sp1 Update Januari 2016_Part 1

Microsoft Office Pro Plus 2013 Sp1 Update Januari 2016_Part 2

Microsoft Office Pro Plus 2013 Sp1 Update Januari 2016_Part 3

Microsoft Office Pro Plus 2013 Sp1 Update Januari 2016_Part 4

Microsoft Office Pro Plus 2013 Sp1 Update Januari 2016_Part 5

Microsoft Office Pro Plus 2013 Sp1 Update Januari 2016_Part 6

Microsoft Office Pro Plus 2013 Sp1 Update Januari 2016_Part 7
 
MirrorCreator
 
Microsoft Office Pro Plus 2013 Sp1 Update Januari 2016_Part 1

Microsoft Office Pro Plus 2013 Sp1 Update Januari 2016_Part 2

Microsoft Office Pro Plus 2013 Sp1 Update Januari 2016_Part 3

Microsoft Office Pro Plus 2013 Sp1 Update Januari 2016_Part 4

Microsoft Office Pro Plus 2013 Sp1 Update Januari 2016_Part 5

Microsoft Office Pro Plus 2013 Sp1 Update Januari 2016_Part 6

Microsoft Office Pro Plus 2013 Sp1 Update Januari 2016_Part 7


 www.ayekyaw.org

Activator All Windows and Office – Re-loader Activator 2.1 Final


Re-loader Activator 2.1 ေနာက္ဆံုးထြက္ Version ေလးထြက္လာပါျပီ။ Re-loader Activator 2.1 ကေတာ့ ကြ်န္ေတာ္ တို႕အသံုးၿပဳေနတဲ႕ကြန္ပ်ဴတာ မွာ Activate မျဖစ္ေသးရင္ ဒီေဆာ့ဝဲလ္ေလးနဲ႔ Activate ၿပဳလုပ္နိုင္မွာၿဖစ္ပါတယ္..။ Office  2010,2013,2016 နဲ႕ Windows Vista, 7 , 8 , 8.1,10 နဲ႕ အျခားေသာ Microsoft OS ေတာ္ေတာ္မ်ား မ်ားကို Activate လုပ္ေပးႏိုင္တဲ႕ Software ေလးၿဖစ္ပါတယ္။ ဖိုင္ဆိုဒ္ကေတာ့ 1.35 MB ရွိပါတယ္။ အသံုးၿပဳလိုတဲ႕ မိတ္ေဆြမ်ား ေအာက္က ကိုယ္ၾကိဳက္တဲ့ Link ကေန Download လုပ္ယူသြားႏိုင္ပါတယ္။


 www.ayekyaw.org

ဖိုတိုေရွာ့ျဖင့္ ဆီေဆးပန္းခ်ီကားတခ်ပ္ေရးဆြဲနည္း - အပုိင္း (၁၉)


 ဖိုတိုေရွာ့ျဖင့္ ဆီေဆးပန္းခ်ီကားတခ်ပ္ေရးဆြဲနည္း
 
မဂၤလာပါ ဖိုတိုေရွာ့နဲ႕ပါတ္သက္လို႕ နည္းလမ္းေလးတစ္ခုကို မွ်ေ၀လုိက္ပါတယ္ သည္ပို႕စ္ေလးကို ရိုးရိုးေလးမွ  အေသးစိတ္ေရးသားထားျပီး ပန္းခ်ီပညာနဲ႕သက္ဆိုင္တဲ႕ နည္းလမ္းေလးျဖစ္တဲ႕
ေရေဆး..ဆီေဆး စတဲ႕ေရးဆြဲနည္း ဒီဇိုင္းေလးတမ်ိဳဘဲျဖစ္ပါတယ္  ဒါကေတာ့ ဆီေဆးပန္ခ်ီကားေလးလို ပုံေဖၚသြားမွာျဖစ္ပါတယ္.ဆီေဆးပန္းခ်ီတစ္ခ်ပ္ေလာက္ ဆြဲၾကည့္ရေအာင္ဗ်ာ။ အရင္ဆံုးပံု တစ္ပံုေလာက္ဖြင့္လိုက္ပါ။ ရႈခင္းေကာင္းေကာင္းေလးေပါ့။ မိမိတို႕ ႏွစ္သက္ရာ ရွဳခင္သဘာ၀ ပုံေလးေတြကိုျပန္လည္ ျပဳျပင္ ၾကမွာျဖစ္ပါတယ္.. ေအာက္မွာေလ့လာလုိက္ပါေနာ္..။

(၁) ဖြင့္ထားတဲ့ပံုကို Layer>New>Layer via copy (သို႔) Ctrl+J နဲ႔ပြားလုိက္ပါ။ ၿပီးရင္ေတာ့ Image> Adjustments>Hue/Saturation (သို႔) Ctrl+U ကိုႏွိပ္လိုက္ပါ ။  Hue;0, Saturation: 63, Lightness; 0 ထားကာ OK လုိက္ပါ။ ကၽြန္ေတာ္လုိခ်င္တာ ကာလာအရင့္ပါ။ သူငယ္ခ်င္း ပံုမွာလည္းဒီအတိုင္းယူရမယ္လုိ႔ မဆုိလုိပါ။ အရင့္ေရာင္ျဖစ္ေအာင္ယူပါ။
(၂) ေနာက္ထပ္ Image>Adustments>Brightnes/Contrast ကိုႏွိပ္ပါ။ Brightness: 31, Contrast:21 ထားၿပီး Ok လိုက္ပါ။ ကာလာေတြပိုထင္ရွာေနေအာင္လုိ႔ပါ။ ပံုအေနအထားကိုခ်ိန္ဆယူပါ။
(၃) အထက္ပါခ်ိန္ထားတဲ့ Layer ကို Layer>New>Layer via copy (သို႔) Ctrl+J နဲ႔ပြားလုိက္ပါ။ ၿပီးရင္   ေတာ့ Filter>Artistic>Plastic wrap ကုိႏွိပ္လုိက္ပါ။ ဒီေနရာကေနစၿပီး အဆင့္မ်ားကုိ  ေသခ်ာလုပ္ေစ ခ်င္ပါတယ္။ ကၽြန္ေတာ္ ျပထားတဲ့ပံုေတြကို ၾကည့္ရင္ရွင္းပါလိမ့္မယ္။
(၄) က်လာတဲ့ေဘာက္မွာ Plastic wrap ,Highlight Strength: 15, Detail: 9, Smoothness: 7 ယူပါ။ Ok ကိုႏွိပ္မျပစ္ပါနဲ႔ဦး။ ကၽြန္ေတာ္ျပထားတဲ့ ပံုက ေအာက္ဆံုးမွာ အနီနဲ႔ေဘာင္ခတ္ထားတဲ့။ New effect layer အိုင္ကြန္ကို ထပ္ႏွိပ္လိုက္ပါ။ effect layer ေနာက္တစ္ခုထပ္တက္လာပါလိမ့္မယ္။
(၅)  New effect layer အိုင္ကြန္ကိုႏွိပ္ၿပီးရင္ေတာ့  Plastic wrap ယူထားတဲ့ေနရာမွာဘဲ Paint Daubs ကိုထပ္ယူပါ။ Brush size: 8, Sharpness: 7, ထားေပးပါ။
(၅) ေနာက္ထပ္New effect layer အိုင္ကြန္ကို ထပ္ႏွိပ္လိုက္ပါ။ effect layer ေနာက္တစ္ခုထပ္တက္လာ ပါလိမ့္မယ္။ Texturizer ကိုယူေပးပါ။ Scaling: 100, Relief: 4 ထားေပးပါ။ ကၽြန္ေတာ္ပံုမတင္ေပးေတာ့ ဘူးေနာ္။ အဲ့ဒီေနရာမွာပါဘဲ။ 
(၆) ေနာက္ထပ္New effect layer အိုင္ကြန္ကို ထပ္ႏွိပ္လိုက္ပါ။ effect layer ေနာက္တစ္ခုထပ္တက္လာ ပါလိမ့္မယ္။ Glass ကိုယူေပးပါ။ Distortion: 5, Smoothness: 3 ထားေပးပါ။ အထက္ပါ (၄) ဆင့္ယူၿပီး ရင္ေတာ့ Ok ကိုရဲရဲႀကီးသာ ႏွိပ္ခ်လိုက္ပါေတာ့ဗ်ာ။ မလြဲေစရပါဘူးေနာ့္
(၇) ေနာက္ထပ္ ကၽြန္ေတာ္တို႔ Layer box ရဲ႕ ေအာက္ဆံုးမွာရွိတဲ့ ေအာ္ရဂ်င္နယ္ပံုေလးကို Layer> New> Layer via copy (သို႔) Ctrl+J နဲ႔ပြားလုိက္ပါ။ ကၽြန္ေတာ္ပံုနဲ႔ျပထားပါတယ္။
(၈) ပြားထားတဲ့ေလယာေလးကို ကၽြန္ေတာ္တို႔ ေလယာေတြရဲ႕အထက္ဆံုးေရာက္ေအာင္ ေမာက္နဲ႔ကလစ္ ၿပီးအထက္ဘက္ကိုဆြဲတင္သြားလိုက္ပါ။ အထက္ဆံုးကိုတင္ရမွာေနာ္။ အထက္ဆံုးတင္ထားတဲ့ေလယာ မွာ Image>Adjustments>Desaturate (သို႔) Shift+Ctrl+U ကိုႏွိပ္ၿပီးအမဲျဖစ္ေအာင္ေျပာင္းလုိက္ပါ။

(၉) အျဖဴအမဲျဖစ္သြားရင္ေတာ့ Filter>Stylize>Emboss ကိုႏွိပ္လိုက္ပါ။ Angle:180, Height:5, Amount: 45 ေလာက္ေပးၿပီးေတာ့ Ok လိုက္ပါ။

(၁၀) က်န္တာကေတာ့ လြယ္သြားပါၿပီဗ်ာ။ Layer box က Normal ကို Vivid Light ေလးေျပာင္းေပးလုိက္ ရံုနဲ႔ သူငယ္ခ်င္းရဲ ေဆးေရးပန္ခ်ီလွလွေလးရသြားမွာပါဗ်ာ။

ကဲသူငယ္ခ်င္းတုိ႔ေရး လက္တည့္စမ္းၾကည့္ၾကပါဦး။ ကၽြန္ေတာ္လုပ္ထားတဲ့ပံုေလးတင္ေပးလုိက္ပါတယ္ဗ်ာ။


အားလုံးအဆင္ေျပၾကပါေစ..ကြ်န္ေတာ္ျပန္လည္ ေ၀မွ် လိုက္လို႕နည္းပညာတခုခုရတယ္ဆိုရင္ ေက်နပ္ပါပီ.. သည္နည္းပညာေလးကို ရိုးရိုးေလး  မွအေသးစိတ္ေရးသားထားပါတယ္.. ေနာက္ထပ္ ဖိုတိုေရွာ့နည္းပညာေတြကိုလည္း ဆက္လက္ ေ၀မွ်ေပးသြားမွာျဖစ္ပါတယ္..

ဘေလာ့ခရီးသည္(နည္းပညာမွ်ေ၀ျခင္း)
www.aungsanmks.com

ဖိုတိုေရွာ့ျဖင့္ မ်က္ႏွာျပင္ဒီဇိုင္း ေရးဆြဲနည္း - အပိုင္း (၂၀)


ဖိုတိုေရွာ့ျဖင့္ မ်က္ႏွာျပင္ဒီဇိုင္း ေရးဆြဲနည္း

 မဂၤလာပါ..သည္ေန႕ ျပန္လည္ေ၀မွ် ျခင္တဲ႕ နည္းပညာေလးကေတာ့ဖိုတိုေရွာ့နည္းပညာတစ္ရပ္ျဖစ္တဲ႕ ဖိုတိုေရွာ့ျဖင့္  ပုံတပုံရဲ႕ မ်က္ႏွာျပင္အေနထားကို အမ်ိဳးမ်ိဳး ဖန္တီးယူလို႕ရပါတယ္.. သည္နည္းကေတာ့ မ်က္ႏွာျပင္မွာ မ်က္ႏွာပုံရိပ္ေလးေတြ မ်ားစြာ ထည့္သြင္းျပီး ေရးဆြဲတဲ႕နည္းဘဲျဖစ္ပါတယ္..
ေအာာက္မွာေလ့လာလိုက္ပါ.. ပထမဆုံး အသုံးျပဳမဲ႕ ဖိုတိုေရွာ့ေဆာ့၀ဲလ္ကို ဖြင့္လိုက္ပါ..
လြယ္ကူတဲ့နည္းေလးပါ။ ကၽြန္ေတာ္သိသမွ်၊ ျမင္သမွ်ေလေတြကို မွ်ေ၀တဲ့သေဘာပါ။ ပထမဆံုးအသံုးျပဳမယ့္ ပံုတစ္ပံုေလာက္လုိ႔ဖြင့္လုိက္ပါ။ မ်က္ႏွာျပင္ဦးစားေပး ပံုလို႕ ဆိုရပါမယ္။
(၁) ပထမဆံုး Tool box မွ Crop tool ကိုယူၿပီးမ်က္ႏွာျပင္တစ္၀ိုက္ကုိဘဲ ၀ိုက္ၿပီး ယူလုိက္ပါ။ ၿပီးရင္ေတာ့ Enter ေခါက္လုိက္ေပ့ါဗ်ာ။
(၂) ကၽြန္ေတာ္တုိ႔ Crop tool နဲ႔ျဖတ္ထားတဲ့ပံုကို ထားလုိက္ပါဦး။ ဒီျဖတ္ထားမဲ့ ပံုမွာအစားထုိးမဲ့ ပံုေနာက္ထပ္ (၄) ပံုေလာက္ထပ္ဖြင့္လုိက္ပါ။ 
(၃) ခုဖြင့္ ပံု (၄) ပံုကိုလည္း Tool box မွ Crop tool ကိုယူၿပီးမ်က္ႏွာျပင္တစ္၀ိုက္ကုိဘဲ Width:50, Height:50, Resolution: 0.393 , Pixels/cm ထားၿပီး ၀ိုက္ဖ်က္လုိက္ပါ။
(၄) ေနာက္ပံု (၃) ပံုကိုလည္းအထက္ပါ ဆက္တင္ထားၿပီးမ်က္ႏွာတစ္၀ိုက္ကိုဘဲျဖတ္ပါ။ ပံု (၄) ပံုလံုးၿပီးရင္ ေတာ့ File>New (သို႔) Ctrl+N နဲ႔ နယူးေပ့တစ္ခုေတာင္းပါ။ ထားရမယ့္ ဆက္တင္ကေတာ့  width:100 Pixels,Height:100 Pixels ,Resolution:72 ထားၿပီးအိုေကလုိက္ပါ။ ၿပီးရင္ေတာ့ ကၽြန္ေတာ္ တုိ႔ေစာေစာက ျဖတ္ထားတဲ့ ပံု (၄) ပံုကို ဒီနယူးေပ့ထဲကို Tool box မွ Move tool ကိုသံုးၿပီးေတာ့ ဆြဲထည့္ လုိက္ပါ။
(၅) ၄ ပံုစီထားတဲ့ ေပ့မွာ Layer ေတြကကြဲေနတဲ့အတြက္ တစ္ခုထဲျဖစ္ေအာင္ Layer>Merge Visible (သုိ႔) Ctrl+Shift+E ျဖင့္ေပါင္းလုိက္ပါ။
(၆) ေပါင္းထားတဲ့ layer ကို Image>Adjustment>Desaturate (သုိ႔) Ctrl+Shift+U ျဖင့္ အျဖဴ အမဲ ေျပာင္းေပးလုိက္ပါ။ ၿပီးရင္ေတာ့ Edit>Define patten ကိုႏွိပ္ၿပီး က်လာတဲ့ေဘာက္မွာ 4Girl လို႔ အမည္ေပးၿပီး အိုေကလုိက္ပါ။ 
(၇) ကၽြန္ေတာ္တုိ႔ အရင္ဆံုး မ်က္ႏွာကိုဘဲျဖတ္ထားတဲ့ပံုကို ျပန္သြားပါမယ္။ ၿပီးရင္ေတာ့ပံုရဲ   ေလယာေဘာက္မွ  Create a new layer ကိုႏွိပ္ၿပီးေလယာအသစ္ေခၚလိုက္ပါ။


(၈) ကၽြန္ေတာ္တုိ႔ယူထားတဲ့ ေလယာအသစ္မွာဘဲ Layer box ေအာက္မွ Create new fill or adjustment layer မွ Pattern ဆိုတာကိုႏွိပ္လိုက္ပါ။

(၉) က်လာတဲ့ေဘာက္မွ Click to open pattern picker ဆုိတဲ့ေနရာမွာ ကၽြန္ေတာ္တို႔လုပ္ထားတဲ့ pattern ေလးကို ေရြးပါ။ Scale မွာေတာ့ ကၽြန္ေတာ္ဒီပံုမွာ 903 ထားပါတယ္။ သူငယ္ခ်င္းပံုနဲ႔ အဆင္ေျပမဲ့ ႏႈန္းထားပါ။ ၿပီးရင္ေတာ့ အိုေကလုိက္ေပါ့။


(၁၀) ကေတာ့ layer box မွ Normal ကို Overlay သုိ႔ေျပာင္းလုိက္ပါ။
ကဲ ........ ကၽြန္ေတာ္တုိ႔ရဲ႕ပံုေလးကို ၾကည့္လုိက္ပါဦး ...........။  မ်က္ႏွာပံုေလးေတြေနရာမွာ အျခားပံုေတြ လည္းထည့္လုိ႔ရပါတယ္။ သူငယ္ခ်င္းတုိ႔ႏွစ္သက္သလုိ လုပ္ၾကည့္ပါ။

တတ္သိ နားလည္ျပီးေသာ နည္းပညာရွင္မ်ားကိုအစဥ္ေလးစားလွ်က္ပါ သည္နည္းပညာေလးကို ရိုးရိုးေလး မွေရးသားထားျခင္းျဖစ္ပါတယ္... ၀ါသနာရွင္မ်ားအတြက္ျပန္လည္ေ၀မွ်လိုက္ပါတယ္ေနာ္...အဆင္ေျပၾကပါေစ..

ဘေလာ့ခရီးသည္(နည္းပညာမွ်ေ၀ျခင္း)
www.aungsanmks.com

တင္ထားသမွ် ေခါင္းစဥ္မ်ား

2Step Verification (5) A+အေၾကာင္း (1) Activator (9) Adobe CS3 Master Collection (1) Adobe Premiere Pro CS6 အသံုးျပဳနည္ (1) Adobe Software (12) Android application (1987) Android Game (710) AndroidPhoneဆိုင္ရာ (4) Antivirus (1) Apowersoft ApowerEdit v1.4.7.22 Build 04042019 (1) AVAST! Cleanup Premium 2019 version 19.1 Build 7085 (1) Blog Slider (8) Blogger Button (5) Blogger Comment (17) Blogger Ebooks (1) Blogger Hack (54) Blogger Loading Style (6) Blogger Mouse (1) Blogger Template (44) Blogger Tips (77) Blogger Widget (152) Blogs Html (63) Blogs Post (86) Blogs Tab Menu (53) Blogဆိုင္ရာ (1) Bowser ဆိုင္ရာ (21) Brothers in Arms® 3 v1.4.7c Mod Data [Unlimited Money] (1) Buddha ျမန္မာစာတန္းထုိး (53) Burning Software (34) Burning Tools (47) C-Box (10) Canon LBP 6000 Original Driver (1) Canon LBP 6030 Original Driver & Installation Guide (1) CCleaner 5.56.7144 (Business / Professional / Technician) Multilingual Portable (1) CD/DVD ဆိုင္ရာမ်ား (30) Cleanner-Speed (68) Computer Autoplay ပိတ္ထားနည္း (1) Computer Partationခြဲနည္း (1) Computer ဆိုင္ရာ (189) Computerဆိုင္ရာ (33) Converter (73) Desing Card (10) Display အလုပ္မလုပ္ေသာ ျပႆနာေျဖရွင္းနညး္မ်ား (1) Domain (3) Download Manager (42) Drive SnapShot v1.46.0.18213 (1) Driver Software (46) DVD-Cloner Platinum 2019 v16.30 Build 1446 [x86/x64] (1) DVDFab v11.0.2.4 [x86/x64] (1) Easy Translator version 14.0.0 (1) Ebooks (405) Errorေျဖ႐ွင္းနည္း (1) Eset Smart Security 12.1.34.0 (x86/x64) (1) Facebook (152) Folder Lock (17) Fonts မ်ားစုစည္းမႈ (6) Foxit PhantomPDF (1) Game (47) Game PC (32) Glary Utilities PRO version 5.117.0.142 (1) Gmail-Gtalk (70) GoogleChome &InternetDownloadmananger (1) Hacking (81) How To Download (6) Html (51) Internet Download Manager (18) InternetDownloadmananger(IDM) (1) IP Hider Software (6) Java Script (11) KhineMaster (1) KMS/2038 & Digital & Online Activation Suite v6.9 (1) MAGIX SOUND FORGE Pro 13 v.13.0.0 Build 46 (1) Marquee Technique (14) Media Player (31) MI Play store Apk (1) Microsoft Office (21) Mobile Legends Bang Bang Installer .exe Pc Version (1) Motors ( ေမာ္တာမ်ား )အေၾကာင္း (1) Movie (95) My Pdf (35) Myanmar Font (9) Myanmar Typing Software (1) MZW Solftware (1) NetGuide Journal (63) Network Software (7) New Blogs (15) Notကာကြယ္ျခင္းနည္း (1) ONEKEY PDF Convert to Word 4.0 REPACK (1) Partition Software (7) Password Recovery Software (1) paypal နွင္ ့ဆိုင္ေသာ (5) PC GAMES (17) PC recovery (13) PC Software (203) PC Speed Up (32) PC-Clean Software (73) PDF (4) PDF Editor (10) Photo Editor Software (65) PHOTO SHOP (သင္တန္း)သီးသန္႔ (44) Photo Slideshow (12) photoshop background အလန္းမ်ား (6) photoshop PNG ဖိုင္မ်ားရွာရန္ (14) Photoshop Software (36) Photoshop ဆိ္ုင္ရာ (51) Player (8) PrinterDriver (2) Programming (16) Pyidaungsu font (1) Read More (9) Recent Posts Widget (23) Recover Software (46) Recovery (33) Refresh and Restoreအေၾကာင္း (1) Reset (1) SAMSUNG One UI ဖုန္းေတြအတြက္ ျမန္မာေဖာင့္ (1) Screen Video Recorder (37) Search Box (6) Security Software (36) Sidebar Widget (71) SkyNet လိုင္းအသစ္ထည့္နည္း (1) SkynetBinfile (1) Slideshow Movie Maker (7) Social Widget (19) SOFTWARE (588) Software For Blogs (17) Software မ်ားအသံုးျပဳနည္း (2) Softwares ေတြအတြက္ Serial no (or) Key ေတာင္းလၽွင္ ေျဖ႐ွင္းနည္း (1) Speed Up Internet (13) TeamViewer version 14.2.2558.0 (Repack & Portable) (1) TTA Pie Myanmar (1) Unicode ေ​ြေပာင်းနည်း (1) Uninstaller Software (25) Upload (6) USB ျဖင့္၀င္းဒိုးတင္နည္း (4) USB ႀကိဳးကေန Virus မဝင္ေအာင္ ႀကိဳတင္ ကာကြယ္နည္း (1) Usb-Memory (19) Video Converter (29) Video Editing (76) Video Editor (1) Video Recorder (12) Virus ဆိုင္ရာ (86) WannaCry Ransomware ၏ အႏၱရာယ္ အေၾကာင္းႏွင့္ ကာကြယ္နည္း (1) Web Design ေရးဆြဲနည္း (5) Webcam Camera Software (11) Website ေရးနည္း (3) Wifi ဆိုင္ရာ (32) Win Update v1.4 (1) Window-10 ဆိုင္ရာ (2) Window-7 ဆိုင္ရာ (32) Window-xp ဆုိင္ရာ (2) window8ဆိုင္ရာ (19) Windows 10 Factory Reset ခ်နည္း (1) Windows 10 Backup & Restore လုုပ္နည္း (1) Windows 10 ကြန္ပ်ဴတာမွာျမန္မာစာတိက်မွန္စြာထည့္နည္း (1) Windows Activator (18) windows loader မ်ား (10) Windows Manager Software (23) Windows Themes (24) Windows တင္နည္းမ်ား (6) WinRAR 5.70 (Fully) (1) WinRar Full Version (12) WinRAR V3.80 Beta Version (1) WinToBootic ႏွင့္ USB ထဲ Install လုပ္နည္း (7) WinUtilities Professional Edition Tool (1) Wordpress Tips (3) Write-Protected ကို ျဖဳတ္ႏိုင္မယ့္နည္းႏွစ္သြယ္ (1) Zawgyi နဲ႔ Unocode ဘာကြာလဲ (1) ကြန္ပ်ဴတာ User Account Picture အေၾကာင္းမ်ား (1) ကြန္ပ်ဴတာဆိုင္ရာ (1) ကြန္ပ်ဴတာပတ္၀ပ္ေျပာင္းမရေအာင္လုပ္နည္း (1) ကြန္ပ်ဴတာရဲ ့Storage က HDD လား? SSD လား? စစ္ေဆးနည္းမ်ား (1) ကြန္ပ်ဴတာဟန္းေနရင္ေျဖ႐ွင္းနည္း (1) ကြ်နုပ္ႏွင့္ ပရဟိတအလွဴ (9) ကာမသိဒၶိက်မ္း (1) ခ်က္နည္းျပဳတ္နည္း (1) နည္းပညာဆိုင္ရာ (2) နည္းလမ္းမ်ား (6) ပန္ကာျပဳျပင္နည္း (1) ဖိုင္ေျဖနည္းမ်ား (8) ဗဟုသုတ (6) ဗားရွင္းအသစ္ထြက္ရွိလာတဲ႔ Facebook (ႏွင္႔) Messenger (1) ဘာသာစကား ၉၁ မ်ိုးထိ ပါ၀င္တဲ့ Easy Translator (1) ဘာသာေရးစာအုပ္မ်ား (9) မိမိဆိုက္ကိုေကာ္ပီကူးမရေအာင္ ပိတ္ထားနည္း (1) ျပည္ေထာင္စု ေဖာင့္ လက္ကြက္ ႏွင့္ စာ႐ိုက္နည္း (1) ျမန္မာစာမွန္ေအာင္လုပ္နည္း (1) ျမန္မာဆိုတာ (1) ဝင္းဒုိးကုိ AOMEISoftware ျဖင္႔ Backup & Restore လုပ္နည္း (1) သင့္ Laptop ကို ျမန္ဆန္ေအာင္လုပ္ေပးမယ့္ အခ်က္ ၇ ခ်က (1) အင္တာဗ်ဴးအစီစဥ္ (2) အပ်ိဳလမ္းၫႊန္ (1) အသံဇာတ္လမ္း (19) အေျခခံကြန္ပ်ဴတာ Pdf (1) ဦးဇာနည္နည္းလမ္းမ်ား (7) ေဆာ့ဝဲ ျပႆနာေျဖ႐ွင္းနည္း (1) ေၾကာ္ျငာ (13) ေဟာေျပာပြဲ (15)

မန္ဘာ၀င္လို႕အားေပးၾကပါ